
Mastering Dotfiles: A Guide to GNU Stow

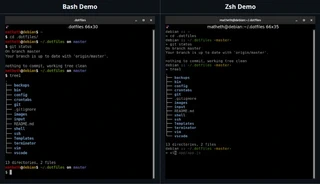
Across all the years that I had to resintall Linux; like when i broke stuff irreparably and had to reinstall, when I tried out many distros, never deciding whether I want dual boot with Windows or straight up Linux and swithicing constantly; I have always struggled with remembering all my specific aliases, configurations and functions.
After the third time of having to do this I wised up and created my first dotfiles repository to track my configuration, yet I still had to clone this repository and manually replace each default configuration file for mine. This can be straightforward for a couple of files but when you reach 5+ or even if you have specific configuration set for applications like Terminator or Cursor this becomes a nightmare.
Today, I am sharing a complete beginner’s guide on how I manage my environment using GNU Stow, a symlink farm manager that turns a messy home directory into a version-controlled masterpiece.
This guide explains everything from installing Stow to understanding directory structures and actually linking your dotfiles. No prior experience with Stow or symlinks is assumed.
Check the github repository –> Stow-Guide
1. What are dotfiles and why use Stow?
Dotfiles are configuration files whose names usually start with a dot (e.g. .zshrc, .gitconfig). They live in your home directory (~ or /home/yourname on Linux, /Users/yourname on macOS). Programs read them to customize your shell, Git, editor, etc.
The problem: Dotfiles are scattered in ~. Backing them up, moving them to a new machine, or sharing them is messy if you copy files by hand.
What Stow does: Stow creates symlinks (shortcuts) in your home directory that point into a single folder. So:
- Your “real” config files live in one place (e.g.
~/Stow-Guide). - In your home directory you only see links that point into that place.
- Edit the file in the repo → the link in
~“sees” the same file. Backup the repo (e.g. with Git) and you’ve backed up all your dotfiles.
GNU Stow is the program that creates and removes those links in a consistent way (all of the grains of sand in the planet earth wouldn’t be enough to count how many times I’ve messed up a symlink and lost all data). You run it from a directory that contains one folder per “package” (e.g. shell, git, vim). Stow then links the contents of each package into a target directory (here: your home ~).
2. What is a symlink
A symlink (symbolic link) is a special file that acts like a pointer to another file or folder. When a program opens ~/.zshrc, the system follows the pointer and reads the file it points to (e.g. the one inside your dotfiles repo).
- You edit the file in the repo; the link in
~always “shows” that same file. - Deleting the link only removes the pointer, not the real file in the repo.
- Stow creates these links for you so the layout in
~matches what programs expect (e.g.~/.zshrc,~/.config/Cursor/...).
3. Installing GNU Stow
You need Stow installed before you can run any stow commands.
Linux (Debian / Ubuntu / similar)
Open a terminal and run:
sudo apt update
sudo apt install stow
Enter your password when asked. When it finishes, check that it worked:
stow --version
You should see a version number (e.g. stow (GNU Stow) version 2.3.1).
macOS
If you use Homebrew:
brew install stow
Then:
stow --version
Other systems
- Fedora / RHEL:
sudo dnf install stow - Arch:
sudo pacman -S stow - FreeBSD:
pkg install stow
If your OS isn’t listed, search for “install GNU Stow” plus your distro name.
4. Where things live in this repo
With Stow, you can have whatever folder structure you want inside your tracked repository. This allows you to maintain several different configurations that you can quickly test out to see if you like them.
As an example, I share my current configuration below.
My Stow-Guide has a root directory (the folder you get when you clone it). Inside that:
README.md— Short overview and reference.STOW-BEGINNER-GUIDE.md— The original file this post is based on.backups/— Contains two different things:backups/stow/— This is the directory that holds all Stow packages. You will run thestowcommand from insidebackups/stow/.backups/periodic-backup/— Other backup data (e.g. crontabs). Not used by Stow for linking dotfiles.
So:
- Stow packages = everything that Stow will link into your home = the direct subfolders of
backups/stow/. - Each of those subfolders is one package (e.g.
shell,git,vim). The names of those folders are what you pass tostow(e.g.stow -vSt ~ shell).
Folder layout (simplified):
Stow-Guide/                   ← repo root (e.g. ~/Stow-Guide)
├── README.md
├── STOW-BEGINNER-GUIDE.md
├── backups/
│   ├── stow/                 ← run "stow" from here
│   │   ├── shell/            ← package "shell"
│   │   ├── git/              ← package "git"
│   │   ├── vim/              ← package "vim"
│   │   ├── ssh/
│   │   ├── input/
│   │   ├── cursor/
│   │   ├── terminator/
│   │   ├── bin/
│   │   ├── backups/
│   │   └── Templates/
│   └── periodic-backup/      ← not used by stow for ~
Why “backups/stow”?
MY repo was set up so that the actual Stow packages live under backups/stow/. The important part is: **you must run stow from inside backups/stow/** (or pass that path to Stow). The rest of the repo stays out of the way of Stow.
5. How the folder structure becomes your home directory
Stow does not link the package folder itself. It links the contents of each package so that the paths inside the package mirror your home directory.
Rule: Everything inside a package folder is placed under the target (here: ~) with the same path.
Example: shell package
This package contains configuration files for various shells (Bash, Zsh, Fish). Note how it handles both files in the root and nested directories.
Folder structure inside backups/stow/shell/:
shell/
├── .config
│   └── config.fish
├── .oh-my-zsh/themes
│   └── themes
│       └── afowler.zsh-theme
├── .aliases
├── .bash_profile
├── .bash_prompt
├── .bashrc
├── .functions
├── .functions.fish
├── .git-repos-globally.txt
├── .profile
└── .zshrc
To install this package, you run the following command from inside backups/stow/:
stow -vSt ~ shell
What happens:
Stow mirrors the structure found inside shell/ directly to your home directory (~):
~/.zshrc→ symlink to…/backups/stow/shell/.zshrc~/.bashrc→ symlink to…/backups/stow/shell/.bashrc~/.config/config.fish→ symlink to…/backups/stow/shell/.config/config.fish~/.oh-my-zsh/themes/afowler.zsh-theme→ symlink to…/backups/stow/shell/.oh-my-zsh/themes/afowler.zsh-theme
Understanding the command flags:
-v(Verbose): Reports what changes are being made so you can see exactly what Stow is doing.-S(Stow): Explicitly tells Stow to “stow” (install) the package.-t ~(Target): Specifies the target directory where the symlinks should be created.~represents your home directory.shell: The name of the package (the folder name) you want to stow.
Summary table (what each package puts in ~)
If we look at the other folders we can create the following table:
| Package | What appears in your home directory |
|---|---|
| shell | .zshrc, .bashrc, .profile, .aliases, .functions, .oh-my-zsh/..., etc. |
| git | .gitconfig, .gitignore |
| vim | .vimrc |
| ssh | .ssh/config |
| input | .inputrc (readline config) |
| cursor | .config/Cursor/User/settings.json, keybindings.json |
| terminator | .config/terminator/config |
| bin | change-background, .local/bin/env, .local/bin/uv, etc. |
| backups | Files under backups/ and .backups/ (lists and dconf backups) |
| Templates | Templates/main.r, Templates/main.cpp |
Understanding this “package contents mirror ~” idea is the key to mastering Stow.
6. Step-by-step: linking your dotfiles (stowing)
Step 1: Open a terminal
Open your usual terminal (e.g. GNOME Terminal, Konsole, iTerm, Terminal.app).
Step 2: Install Stow
Make sure it is installed (see section 3).
Step 3: Go to your home directory
cd ~
Step 4: (Optional) Remove an old clone
If you already have a Stow-Guide folder and want to start fresh:
rm -rf Stow-Guide
Step 5: Clone the repository
git clone https://github.com/matheth/Stow-Guide.git
Step 6: Go into the Stow directory
All Stow commands must be run from the directory that contains the package folders. In this repo, that’s backups/stow:
cd ~/Stow-Guide/backups/stow
ls
You should see names like bin, cursor, git, shell, vim, etc.
Step 7: Preview what Stow will do (dry run)
Before creating any links, do a dry run. The -n flag means “don’t change anything, only show what would happen”:
stow -nvSt ~ *
-n= no changes (preview)-v= verbose (explain each action)-S= stow (create links)-t ~= target directory is your home*= every folder in the current directory (every package)
Step 8: Resolve conflicts (if Stow reports any)
If Stow says something like “existing file is in the way”, it means you already have a real file or directory at that path (e.g. a real ~/.zshrc instead of a symlink). Stow won’t overwrite it to prevent data loss.
Options:
Replace your current file with the repo’s version: Back up your current file if you care about it, then remove it and run Stow again.
mv ~/.zshrc ~/.zshrc.bak
stow -vSt ~ shell
Stow specific packages instead of everything: If you are running into conflicts with one package (like
shell) but want to install others, you don’t have to use*(which tries to stow everything). You can specify exactly which packages you want.For example, to stow only the
gitconfiguration:stow -vSt ~ gitTo stow multiple packages at once (e.g.
git,vim, andssh), just list them with spaces in between:stow -vSt ~ git vim ssh
Step 9: Actually create the links
When the preview looks correct, run the same command without -n:
stow -vSt ~ *
You can check a symlink via ls -la ~/.zshrc to verify it points into ~/Stow-Guide/backups/stow/shell/.zshrc.
7. Unlinking (unstowing)
To remove the symlinks Stow created (without deleting the real files in the repo), you unstow with the -D flag.
Unstow all packages
From the same directory as before:
cd ~/Stow-Guide/backups/stow
stow -nvDt ~ * # preview what would be unlinked
stow -vDt ~ * # actually remove the links
Unstow specific packages
stow -vDt ~ shell git
This only removes the links that the shell and git packages created.
8. Common issues and fixes
“stow: command not found”
Stow isn’t installed or isn’t on your PATH. Install it and try again.
“stow: … existing file is in the way”
You already have a file or directory at that path. Back up the existing file (mv ~/.zshrc ~/.zshrc.bak) and run stow again.
I ran stow from the wrong directory
Stow must be run from the directory that contains the package folders (cd ~/Stow-Guide/backups/stow).
I want to edit my config
Edit the file inside the repo (e.g. ~/Stow-Guide/backups/stow/shell/.zshrc). Because ~/.zshrc is a symlink to that file, the program will see your changes. You can also edit via the link (e.g. nano ~/.zshrc); you’re still editing the same file in the repo.
10. Quick reference
| Task | Command |
|---|---|
| Go to stow directory | cd ~/Stow-Guide/backups/stow |
| Preview link all | stow -nvSt ~ * |
| Link all packages | stow -vSt ~ * |
| Link specific packages | stow -vSt ~ shell git vim |
| Preview unlink all | stow -nvDt ~ * |
| Unlink all | stow -vDt ~ * |
| Unlink specific | stow -vDt ~ cursor |
Flags:
-n— No changes (dry run). Use for preview.-v— Verbose output.-S— Stow (create links).-D— Unstow (remove links).-t ~— Target directory (your home).
Managing your environment this way ensures that whether you are on a new workstation or a remote server, your personal toolkit is only a git clone and a stow away.
Check out the full repository here: Stow-Guide on GitHub.
